Introduction
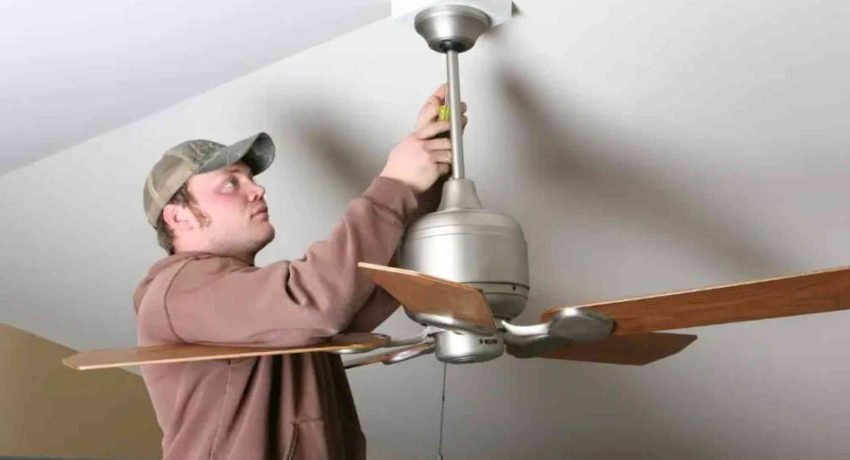
Installing a ceiling fan where no existing fixture exists might sound challenging, but with the right tools, preparation, and guidance, it’s entirely achievable for most homeowners. Whether you’re upgrading your home’s airflow, reducing energy costs, or adding a stylish touch to your space, learning How To Install A Ceiling Fan Where No Fixture Exists — Practical Tips & FAQs will make the task much smoother. This comprehensive guide will take you through every step of the process — from identifying wiring and mounting support to safely connecting and balancing your new fan.
Understanding the Challenge
When there’s no existing electrical box or light fixture in the ceiling, you need to create a safe power source and a secure mounting point. Unlike replacing an existing fan, you’ll have to route wiring through the ceiling, ensure proper support, and follow safety codes. This means planning is essential before you even pick up your tools.
Adding a ceiling fan improves comfort and energy efficiency, but the project requires patience and precision. By following this How To Install A Ceiling Fan Where No Fixture Exists Guide you can approach the process with confidence and skill.
Planning Your Ceiling Fan Installation
Before starting, make sure your ceiling can structurally support a fan. Unlike light fixtures, ceiling fans are heavier and create motion that demands stable support. Check your ceiling’s joists and plan the exact fan placement — ideally, the center of the room for balanced airflow.
If your ceiling doesn’t have pre-existing electrical wiring, you’ll need to determine how to bring power to the new location. The easiest route is to extend power from an existing light switch or nearby outlet. However, if that’s not an option, you might need to run new wiring directly from your electrical panel, which may require a licensed electrician depending on your local building codes.
Tools and Materials You’ll Need
While each project varies slightly, here are the basic tools and materials commonly used for ceiling fan installations without existing fixtures:
-
Ceiling fan kit (with mounting bracket and downrod if needed)
-
Fan-rated electrical box and brace
-
Electrical wiring (14/3 or 12/3 gauge depending on circuit)
-
Fish tape or wire puller
-
Voltage tester
-
Drill and hole saw
-
Screwdriver set
-
Wire nuts and connectors
-
Ladder and protective gear
Safety first — always turn off the power at the circuit breaker before working on any electrical system.
Locate the Ceiling Joist
The first step is to locate the ceiling joist where the fan will be installed. Joists provide the structural support required to hold the fan securely. Use a stud finder to mark the position of the joists. The center of the room often aligns with the midpoint between two joists, so you might use a fan brace designed to fit between them.
If the fan will be placed directly below a joist, install a fan-rated electrical box that attaches firmly to the wood.
Cut the Hole for the Fan Box
Using a hole saw or drywall saw, carefully cut an opening for the fan’s electrical box. The hole should be large enough for the box to fit snugly without gaps. Avoid cutting near air ducts or plumbing pipes.
Once the hole is cut, position your fan-rated electrical box and secure it with mounting screws or braces as instructed in the manufacturer’s guide.
Run Electrical Wiring
This is often the most technical part of installing a ceiling fan where no fixture exists. Use fish tape to pull the new electrical wire from your chosen power source — typically a wall switch or nearby outlet — through the attic or ceiling cavity to the new fan location.
Make sure the wiring meets your local code requirements. For most residential applications, 14/3 or 12/3 wire is sufficient. Leave about six inches of extra wire extending from the electrical box to make the connections easier later on.
Install the Mounting Bracket
Secure the fan’s mounting bracket to the installed electrical box. This bracket will support the entire fan, so ensure it’s tightened and level. A loose bracket can cause wobbling or noise during operation.
Use the screws provided in your fan kit and follow the specific manufacturer’s instructions. Remember that fan-rated boxes are designed to handle the weight and movement of the fan — never substitute them with standard light fixture boxes.
Assemble and Hang the Fan
Carefully assemble your fan components, including the blades, motor housing, and downrod (if applicable). It’s often easier to assemble the main motor unit before hanging it, leaving the blades for last.
With a partner’s help, lift the fan and hook it onto the mounting bracket temporarily while you connect the wires.
Connect the Electrical Wires
Match the colored wires from the fan to those from your ceiling wiring. Typically, black connects to the hot wire, white to neutral, and green or bare copper to ground. Some fans have separate wires for the light kit or remote control receiver — follow your fan’s wiring diagram carefully.
Use wire nuts to secure the connections and tuck them neatly into the electrical box before securing the fan canopy.
Attach the Blades and Test the Fan
Once the wiring is complete and the canopy secured, attach each fan blade using the provided screws. Make sure all screws are tightened evenly to prevent wobbling.
After double-checking that all connections are secure and the power is still off, turn the circuit breaker back on. Test your fan at different speeds to ensure smooth operation and listen for any irregular noises.
If your fan wobbles, use the balancing kit often included with the fan to adjust blade balance.
Safety Tips for Ceiling Fan Installation
Safety is paramount when dealing with electrical systems. Always use a voltage tester before touching any wires. If you’re unsure about running new wiring or connecting to an existing circuit, it’s best to consult a licensed electrician.
Never mount a ceiling fan to a plastic or non-fan-rated electrical box. The force of the rotating blades requires a secure, metal, fan-rated support system.
Also, ensure there’s adequate clearance between the fan blades and the ceiling — at least 7 feet from the floor and 18 inches from walls.
Benefits of Installing a Ceiling Fan
Installing a ceiling fan where no fixture exists not only improves comfort but can also reduce your energy costs significantly. During the summer, fans circulate cool air efficiently, reducing your reliance on air conditioning. In winter, reversing the fan’s direction redistributes warm air that rises to the ceiling.
Moreover, modern ceiling fans come with integrated lighting, smart controls, and aesthetic designs that enhance any room’s appeal. By following the How To Install A Ceiling Fan Where No Fixture ExistsGuide you’ll not only save on professional installation costs but also gain valuable DIY experience.
Common Mistakes to Avoid
One of the biggest mistakes homeowners make is using an incorrect electrical box or neglecting proper support. Always ensure your setup can handle the fan’s weight. Another common issue is improper wiring — double-check connections before turning the power back on.
Avoid installing the fan in a location with low ceiling clearance or without confirming power source capacity. If your circuit is already heavily loaded, adding a fan could cause tripping or overload issues.
Maintenance and Longevity
Once installed, keep your ceiling fan well-maintained by regularly cleaning the blades and motor housing. Dust buildup can cause imbalance or noise over time. Check screws and blade attachments every few months, especially if you notice wobbling.
Lubricate the motor if recommended by the manufacturer and ensure the pull chains or remote controls work smoothly. Proper maintenance can extend your fan’s lifespan to over a decade.
FAQs
Can I install a ceiling fan without attic access?
Yes, it’s possible. You can run wiring through the ceiling from a nearby outlet or switch using fish tape, but it might be trickier.
Do I need a permit to install a ceiling fan?
In most residential cases, you don’t need a permit for replacing or adding a fan. However, check your local codes, especially if running new wiring.
What’s the easiest way to get power to a ceiling fan location?
The easiest way is to extend power from an existing light switch or outlet. This minimizes additional wiring.
How much does professional installation cost?
Hiring an electrician to install a fan where no fixture exists typically costs between $150 and $400, depending on wiring complexity.
Can I use a standard light box for a ceiling fan?
No. Standard boxes are not designed for fan loads. Always use a fan-rated electrical box for safety.
What if my ceiling is sloped?
Use an angled ceiling adapter or longer downrod to ensure the fan hangs vertically.
Learning How To Install A Ceiling Fan Where No Fixture Exists — Practical Tips & FAQs empowers you to upgrade your home’s comfort and efficiency with confidence. While it takes careful planning and safe wiring practices, the results are rewarding — improved air circulation, lower energy costs, and an enhanced aesthetic.
If you want a step-by-step illustrated version, visit the full How To Install A Ceiling Fan Where No Fixture Exists guide for detailed visuals and bonus tips.
And if you’d like to learn more about the latest DIY home improvement trends and expert insights, you can also explore trustworthy resources like BBC for inspiration and practical advice.


